Friday, February 5, 2021

 Day Five.... Wow What a Week!!  

Hope everyone has had fun stopping by the blog this week. I have had a lot of fun creating some great projects with Unity Stamp Company Stamps.  This week I will randomly choose two people to receive a special gift from  The Unity Stamp Company and I want to give a HUGE shout out and a BIG THANKS to the folks over at The Unity Stamp Company. They are a small family owned business and they have the best customer service around. Stop by their site and see all the wonderful creative things they have going on over there and check out their blog to be inspired and encouraged to CREATE. 

The Unity Stamp Company

Unity Stamp Company Blog


Ok Day Five, here we go...... 

This mini album was a mini chipboard album rescued from a clearance bin some Saturday afternoon. Might have paid $2.00 for it. Had been neglecting my scrapbook heart and decided to print some photos from my phone and have a little fun with my favorite stamps!!


Now I will admit, that little window you see there? Totally NOT worth it.... I was not experienced at wrapping a piece of chip board (and let's just say I did it all kinds of wrong and just move on..lol) Next time, do not cut the pre-scored window out. Cover it with paper, you can fake everything else with paper. Your Craft Mat will thank you. 


------------------------------------------------------------------------------


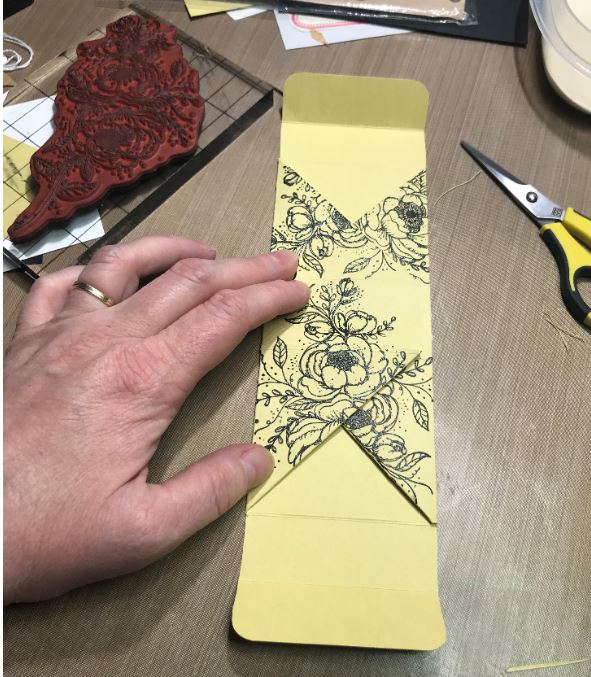
Ok.... so first up, the Cover, Using the TESS GIRL Stamp Set

Wrapped the outer cover with some paper and attached the Tess Girl I had colored with alcohol markers. This girl gets a lot of mileage in my journals. 


#TheLegoAdventure
----------------------------------------------------------------------------------------------------


Next we have a page of me with my beautiful daughters, using the
SHINE BRIGHT GIRLS Stamp Set. 


--------------------------------------------------------------------------------------------------


Here we have a page celebrating my beautiful daughter's Graduation, 
using the GRADUATION WISHES  Stamp Set.  This set is so awesome, I love that I can color the gown to match any school and they offer two different looks. 


Graduate Girl


Also on this layout above I used an older Alphabet Stamp Set to make the 2020 Banner but I could not find the name so if anyone can identify it, please let me know. 


I did not have enough space to use the entire stamp with the frame so I got creative with a sticky note. I cut out the size of the number and only inked inside. 


--------------------------------------------------------------------------------------------------

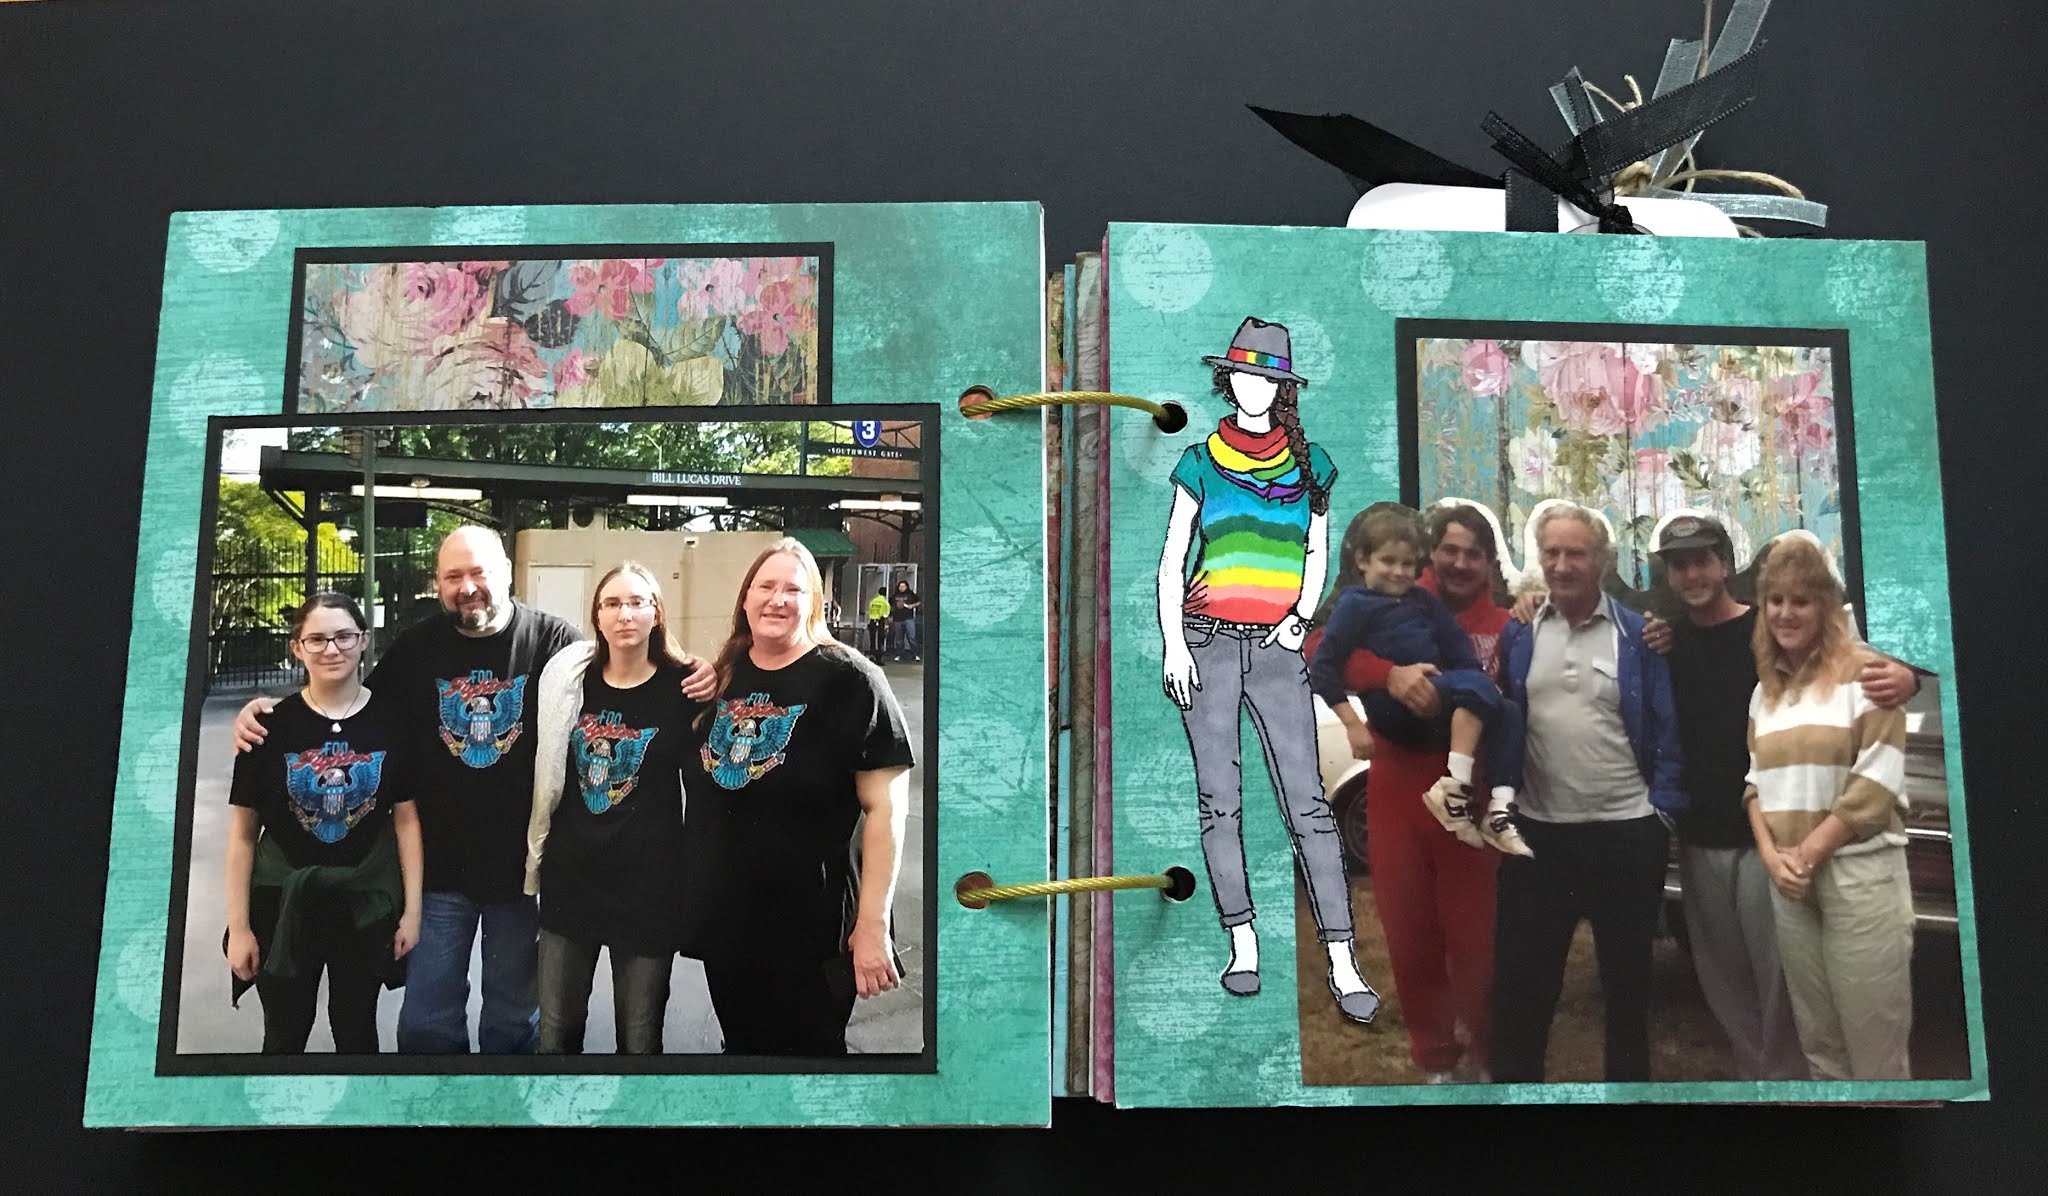
This was a fun layout using the DREW GIRL Stamp Set. 


The photo pockets each hold a journaling card with white cardstock on the back. Each card has a different sentiment using Unity Stamps (sorry, I do not know the names of these stamp sets yet. If anyone knows, please let me know and I will update this section.) 


----------------------------------------------------------------------------------------------


This page is also a work in progress, still struggling with the small photo pockets so the tags are not done. 

Used the SHE NEVER SAYS NEVER Stamp Set here. 
https://www.unitystampco.com/she-never-says-never-june-2017-sentiment-kit/


----------------------------------------------------------------------------------------------


This page will eventually have some Planner Girls on the journal Tags but I didn't get them finished before I needed to get this posted.  Stay tuned and I will update these photos in a few days . 


----------------------------------------------------------------------------------------------

Love this Itty Bitty set I used here on the Beach page. 

The LATER GATOR Stamp Set


and the beautiful SUNSET PROMISE Stamp Set 


Each photo has a journal tag tucked in. I got smart half way through the book and started using foam tape to make the photo pockets. A lot easier to get tags in and out, especially layered things!  #AlwaysTryingToDoItWrong Haha


----------------------------------------------------------------------------------------------

This page turned out so awesome, just like my Big Brother there. When I saw this Kit come out, I knew I had to have it; The Motorcycle in this kit just screamed my Brother. 
Miss him so. Love You Bro


I used the Motorcycle from the 
JUNE 2018 KIT OF THE MONTH


Two journal cards are tucked in here and the pocket was made from some white cardstock with tissue paper attached then torn and inked the top edge. 

The two journal cards will eventually look like concert tickets and the back of them will have journaling about the many concerts we enjoyed over the years. 


 First I stamped the Motorcycle on the blue tissue paper using black pigment ink and I heat embossed it with clear embossing powder.  The funny part here, that was NOT the original pocket I had in mind. BUT, when I went to make the first pocket, I didn't notice I glued it down backwards...yeah,,, the pretty embossed side was UNDER the tissue paper AND it was now going the wrong direction... but like I always say, Blessings come in ugly little boxes sometimes.  I luckily knew myself well enough to have stamped two motorcycles on to the blue tissue paper JUST IN CASE I messed it up, well, we see where that got me...LOL  the original is below (I know, I know, what was I thinking?) The alternative turned out ten times better and the edges done in black really make it pop.... now for the mess up...

I know, I know! Just laugh with me and move along, just movvvvve along. lol 


----------------------------------------------------------------------------------------------

This Fairy always has a special place for me... I used the 
May 2016 KIT OF THE MONTH on this page and the sentiment
comes from that same set as well. 


This is the last page of one fun little project!

----------------------------------------------------------------------------------------------


Wow, What a ride!!!! This little book was a fun one, and I hope you have found some inspiration this week in some of my blog posts. 


Thanks to all of you for stopping by and leaving such wonderful comments. I have enjoyed my Growing In Unity Week for The Unity Stamp Company. Thanks to everyone there for doing what you do!!!  Stay Safe, Be Well, and Take Care of Each Other. 


Thursday, February 4, 2021


Wow, Day Four already??  

So excited to be the Growing In Unity Girl this week for 
 The Unity Stamp Company!!

Don't forget to leave a comment to be entered to win a wonderful gift from the Unity Stamp Company.  I will choose two people at the end of the week from all of the comments. 

THANK YOU UNITY STAMP COMPANY!!
https://www.unitystampco.com/


ok, day four... I have a cute card for the car lovers in your life. 
This card used the Vroom set from The Unity Stamp Company. 


I love this stamp. It is so fun!! and SO BIG!!!! Perfect size for a card front. For this card I stamped the Vroom stamp on two white pieces of cardstock with black pigment ink, then heat embossed. 


I colored one stamped image and left the other one white. This stamp is so well drawn, it can really stand alone without color.  I used my die cut machine to cut out the colored image, then a slightly bigger die to cut out a black frame.  I thought it looked a little too plain so I used some black and teal scraps from the leftovers and added the little banner behind the frame. 


I also added a teal piece of cardstock on the inside of the card to help strengthen the back and balance the weight of the front. (sorry, forgot to take pictures of that)


These next two cards are made using a Unity Stamp set but I am not sure which one. I bought this stamp in the Unity Swap group and I could not find it online, I am sure it is there, maybe in a kit of the month?
(If anyone has this Mandala Snowflake looking stamp, could you please comment below and I will update this section? Thank you)

For this card, I started with a grey card base, stamped with gray on the outer piece and yellow on the inside of the card.  Then I stamped the mandala on white cardstock, fussy cut it out, and inked the edges with a sponge in yellow. Added a simple black band and attached to the front. 
I always like to use the stamp from the card inside for a matching envelope. 


This card was made by stamping the images in black pigment ink and heat embossed, then using Distress Ink and a sponge I colored the images and tore them out. Next I inked the edges and attached to a cream card base.  Not sure where the Thanks stamp comes from but it is not Unity. You can easily tell by the quality of it, it would never pass their standards. Another reason I like to stick with Unity, I KNOW what I am getting!! I know my stamps are going to stamp crisp, my lines are going to be clear, the rubber is going to stamp up to many uses and they hold ink perfectly.  Not so much with the lesser brands. Unity is always TOP QUALITY! 


Well I thought since it was Thursday, I should do a little Throwback Thursday!!!!!   I am going back to 2018 on this one!!! 


I started my journal in 2018 and have used Unity Stamps for YEARS now to personalize my journal, to have words of encouragement and hope sprinkled through to remind me, keep going.  I have covered some of my personal journaling with colored paper, so sorry the pictures are not top notch, but I just wanted to show off a few of my favorite pages that have comforted me (and challenged me lol) over the years. 


This page has a LOT of sets showing out.... Picking your favorite Unity Stamp is like picking your favorite kid...you CAN'T!!  This page was born after a lovely Friendsgiving Celebration at one of my Best Friend's House. 
I wanted to remember the fun, the laughter, the people the moments, and I thought the Unity girls were the perfect fit for capturing that day.  


The Stamp sets used in this layout are as follows:

The Feather is from November 2017 Kit of the Month:
https://www.unitystampco.com/better-with-age-kom-11-17/


(Planner Gal) One Happy Life


(Planner Gal) Be A Beauty


(Planner Gal) Love Them


(Planner Gal) Today


Special Bond


Whatever Comes Next


Unity Girls


This page below was made using the Sew Cute stamp set and the Erica Girl Stamp Set. 


The stamp set used below is the Erica Girl Set


The Sewing Machine and Thread come from the Sew Cute Stamp Set


I stamped and colored this image of the Sewing machine and then used a sticky note mask to cover it while I used distress ink and a sponge to blend the background. 


This lovely stamp called Constance Girl is sprinkled throughout my journal but I think this color version is my favorite. I love the scarf in this stamp. I am a scarf girl, I love them, if there is anything good about winter, it has to be the scarves (well, the boots, ok ok, the boots are pretty awesome) and this Florida girl loves boots, but that is a whole other post...lol lol

Constance Girl
https://www.unitystampco.com/constance-girl/


The page below was my quick fix to covering up the inside page of a one dollar journal and a couple stamps from the November 2014 Kit of the Month. 

I used the soft florals (not sure what plant they are) and the girl stamp to create this front page layout, the first thing I see when I open my journal. I have been looking at this page for 3 years now and I still never wanted to add anything more. 
It is my perfect starting point for my journey into Art Journaling.  


The page below is a little bit busy, but that is the beauty of Art Journaling, you can express your feelings without saying a word sometimes. This page is a combination of whatever was close to me on my craft desk. A few stencils, a few smudges, and of course, a dragonfly stamp called Bold Insight  from the best little Stamp company ever!! Because Dragonflies make everything better right ?


Now to another favorite page.... my trip to visit the bestie and my hometown.  What a trip! We don't get to see each other as often as we would like, being 600 miles away, but we did schedule an Art Class while I was in town and a day on the beach followed by a few days at the resort, this journal page has lots of little tidbits of what we did, where we went, etc. and I bought this set SPECIFICALLY for this page!! I knew it would be the perfect match to our trip, my bestie, and the fun we had!! the images, the sentiments, perfect set!!! 

Gina and Me


I think the butterflies were a Unity Stamp Set as well, but I think those were also a score from a swap. 


The stamp below is another repeater, I add her to a lot of pages.  She also makes a great image for a bookmark or a gift tag. 


Raven Girl


And last but not least..... a tag for fun!!!


This stamp set is so fun for all the Jeep lovers in the world.  Although we probably need a Jeep Ducky (hehehe look it up, it's a thing..lol  Love my Jeep folks!!!!)


Alright folks, this was a jam packed post, don't forget to leave a comment to be entered to win!!! I will randomly pick two winners from all the comments at the end of the week. 


See you tomorrow for a really fun project I have so enjoyed making for this week!!! 


Happy Crafting everyone!! and THANK YOU for stopping by!!


Wednesday, February 3, 2021

 Here we are, Day Three already!!!! 
So excited to be the Growing In Unity Girl this week for the
 The Unity Stamp Company!!

Don't forget to leave a comment to be entered to win a wonderful gift from the Unity Stamp Company.  I will choose two people at the end of the week from all of the comments. 

THANK YOU UNITY STAMP COMPANY!!
https://www.unitystampco.com/


Day Three.... Three Things, hmmm 


Here are today's projects.  Feel free to leave any questions you have in the comments and I will gladly share any tips and tricks on how I made these. 

First Up....
A Card using the Words in Bloom Set from Unity Stamp Company

This card started as a white cardstock base. I smudged some Ranger Distress Inks on my craft mat and spritzed with water. Next I laid the cardstock down in the colors and carefully peeled it back up to find this gem of a background.    

Once my background was dry, I used Versafine Black Onyx to stamp these lovely flowers and embossed with clear embossing powder.  I used markers to color in the flowers. 


Next I mounted the white cardstock to a black mat and then a lavender mat. Next I mounted that to a black base and added a white base inside for a sentiment and to balance the weight of the front layers. 

This stamp set it so lovely. 


Next up....
A Bookmark using the Be The Best Set from Unity Stamp Company


This card was another smoosh technique background, smearing some Distress Inks on my craft mat and spritzing with water. I lay the bookmark (I use watercolor paper to make book marks when doing this technique because it can handle the extra water. Regular 65 pound cardstock tends to fall apart when you get it too wet)


Once I my background was dry I proceeded to stamp and emboss the Dragonfly and sentiment from this set (one of my Favorites, but Dragonflies, it's a given with me )


This set it so easy to use, from Journal pages and tags to beautiful cards and bookmarks. 


and finally.... oh this was so fun!!! 
This little box holds a couple tea bags on each side as well as a bag of cookies inside! 


A Giftbox using the You Are Forever Beautiful 

I used One stamp set and ONE SHEET OF CARDSTOCK!!!  Yes, ONE!!
scored and cut the corners out, I made this in less than an hour and I had never made one before! Stamped it up with the this GORGEOUS set and yes, again, one of my favorites!!! This set packs a big punch!! and such an easy stamp to color!!!

I will park several step by step photos below, super easy!! YOU CAN DO THIS, I promise!!


Once you have all your scoring done and the corners clipped out, you will only need to decorate the triangles, the other parts will be folded inside as you will see below. 


As you can see above, I didn't do a great job on the stamping, but that won't matter here because that side will be folded in and you will never see that panel. 


See, missed spot is hidden in the fold. 


Even without color, this box is still beautiful!


You can actually fit 3 tea bags per side, but it was a little too bulky so I went with two. Depending on some tea bags packaging you can usually fit two using the 8.5x11 cardstock size.  I will have to play around with a 12x12 piece and see how the pockets turn out. Stay tuned!! Maybe that will become a youtube video...hmmmmm 


This little box could be used in so many ways for small gifts, the pockets on each side could hold tags or mini greeting cards, maybe ATC cards?  After I put this together I wished I had stamped another image to fussy cut out and attach to the pocket so you could see the whole flower there, hmmmm Maybe I am not done  :)


Thanks for stopping by and checking out my creations day. I am throughly enjoying my week and can't wait to show you the SUPER SUPRISE for Friday!!!

Don't forget to leave a comment!!  Happy Crafting!!!


Growing In Unity Blog Hop - March 2021

Welcome to the Growing in Unity Blog Hop 2021 The Unity Stamp Company is hosting a Blog Hop and there are TWO prize packs to win so make sur...